10 Tips for Successfully Welding Plastics

Plastic welding is more than a quick task—it’s a job that requires meticulous planning and careful, methodical execution.
So how can you create solid, strong welds that withstand even the most challenging environments? Below, we share 10 helpful tips to guide you.
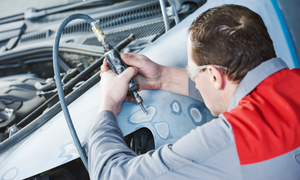
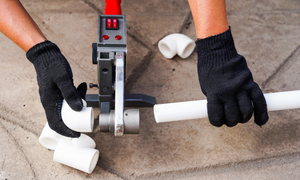
1. Identify The Correct Hot Air Tool For Your Application
As many welding professionals know, you’ll first need to identify the correct tool for your application. While there are a variety of plastic welding applications—including flooring, interior/exterior décor, plumbing, pond and pool liners, roofing, and more—each of these may require a different size or style of hot air tool.
For example, a smaller or hard-to-reach application like welding residential decorative shelving or cubbies would call for a smaller hot air hand tool, such as the Ritmo Stylo Flow-Line Hot Air Tool, HSK Model 500 Digital Hot Air Tool, or Ritmo Stargun Uno Handheld Extruder. Meanwhile, a larger application, such as performing overlap welds on flexible roof membranes (TPO, PVC, etc.), would require larger tools, such as the IHS Type 1600 Hot Air Tool or the Forsthoff P2 45 mm Roof Welding Machine. Using the incorrect tool can ultimately result in weak welds and reduced efficiency.
2. Use Speed Welding Tips
For an efficient weld when fabricating rigid substrates/sheets, use of speed welding nozzles with your hot air hand tools is an undeniable time saver. With these nozzles, you can create strong welds that cool quickly. Keep in mind that you’ll need an intermediary nozzle, such as the IHS 5 diameter mm Tubular/Adapter Nozzle or 10 mm Threaded/Adaptor Nozzle to properly use a speed welding nozzle with your tool.
3. Use The Correct Type of Nozzle
Carefully select the nozzle you'll be using based on your application. For instance, if you’re planning to switch between several types of welds, you’ll want to use a push-fit nozzle, such as the IHS 5 mm diameter tubular/adapter nozzle, that you can quickly and easily take off and replace the speed welding (push-fit) tips. However, if you’re working on an application where you won’t need to constantly switch your nozzle, such as flooring, use a round speed welding nozzle that can screw onto a 10 mm threaded/adaptor nozzle. This type of nozzle is designed for a more secure fit.
4. Consider Material Thickness & Surface Area
Before performing a weld, consult and adhere to guidelines set forth by manufacturer recommendations, a thermoplastic welding certification company, and/or International Organization for Standardization (ISO) standards.
ISO has standardized directives when it comes to welding thermoplastics based on material thicknesses and surface area. These guidelines can serve as a roadmap as you as you plan your welding projects.
5. Use a Tacking Nozzle Where Applicable
For speed welding applications, use a tacking nozzle first to keep the materials you’re welding in place. For instance, with butt-welds or freestanding 90-degree welds, the tacking nozzle will ensure the two materials stay together while you’re welding them. This removes the risk of an unsuccessful, inefficient weld.
6. Know The Correct Temperature For The Plastics You’re Welding
As any welding professional knows, different types of plastic require different levels of heat (see chart below).
Recommendation for Welding Thermoplastic Materials (Sheet or Pipe) – Source: DVS 2207 Part 3 |
| Material Type |
Hot Gas (Air) Temperature (Speed Welding Nozzle) |
Hot Gas (Air) Flow Volume | Pressure Required On Welding Rod | |
| Ø 3 mm – 1/8” | Ø 4mm – 5/32” | |||
| HDPE | 300°C - 350°C 572°F - 662° F |
40 – 50 l/min. 1.4 – 2.1 cfm |
2.0 lbs.–3.5 lbs. | 5.5 lbs.–7.5 lbs. |
| LDPE | 260°C - 320°C 500°F - 608° F |
40 – 50 l/min. 1.4 – 2.1 cfm |
2.0 lbs.–3.5 lbs. | 5.5 lbs.–7.5 lbs. |
| PE | 280°C - 330°C 536°F - 628° F |
40 – 50 l/min. 1.4 – 2.1 cfm |
2.0 lbs.–3.5 lbs. | 5.5 lbs.–7.5 lbs. |
| PVC-U | 320°C - 370°C 608°F - 698° F |
40 – 50 l/min. 1.4 – 2.1 cfm |
1.5 lbs.–2.5 lbs. | 3.5 lbs.–5.5 lbs. |
| Flexible PVC | 320°C - 370°C 608°F - 698° F |
40 – 50 l/min. 1.4 – 2.1 cfm |
1.0 lbs.–1.5 lbs. | 1.5 lbs.–2.5 lbs. |
| CPVC | 350°C - 400°C 662°F - 752° F |
40 – 50 l/min. 1.4 – 2.1 cfm |
3.5 lbs.–4.0 lbs. | 4.0 lbs.–5.5 lbs. |
| PMMA | 320°C - 370°C 608°F - 698° F |
40 – 50 l/min. 1.4 – 2.1 cfm |
2.5 lbs.–3.5 lbs. | 4.0 lbs.–6.5 lbs. |
| PVDF | 350°C - 400°C 662°F - 752° F |
40 – 50 l/min. 1.4 – 2.1 cfm |
2.5 lbs.–4.0 lbs. | 5.5 lbs.–7.5 lbs. |
Attempting to weld plastics at the incorrect temperatures can have detrimental effects. If the temperature is too hot, you can burn out the chemical properties of the plastic, which renders it unweldable. If the temperature is too low, you’ll create a weak weld. In these instances, a digital thermometer such as the HCS Economy K Thermocouple Thermometer can help you better regulate a tool’s heat output. Also, be sure to consult the manufacturer specifications or the manufacturer’s material safety data sheet for the recommended welding temperature for your specific thermoplastic material.
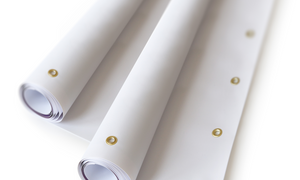
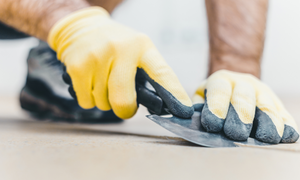
7. Properly Store, Clean, and Prep Your Materials
Because ultraviolet rays can destroy the chemical properties of some materials, store your materials where they aren’t exposed to sunlight. When preparing your materials for use, make sure that they’re properly cleaned and/or scraped. If you’re working in a construction or mining application, your materials will be susceptible to dust and debris, all of which require cleaning. For flexible membranes (awnings, pool liners, roofing, signage, tarpaulins, etc.) review the manufacturer recommendations for cleaning your specific thermoplastic material. Additionally, rigid substrates/panels (shelving panels, storage bins and tanks, vehicle and watercraft components, wall panels, etc.) may have formed a thin layer of surface oxidation. As a precautionary measure, you’ll need to scrape it off before using them.
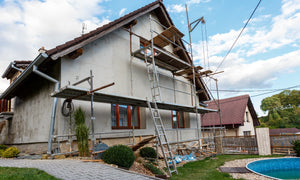
8. Consider Surrounding Temperatures
If you’re welding in an area where the temperature can fluctuate, such as the outdoors, take those surrounding temperatures into consideration. For example, if you’re welding on a roof in the morning, the material you're welding may be colder, and you'll need more heat. On the flip side, if you're welding on a hot summer afternoon, you'll need less heat.
9. Perform Test Welds
Always perform test welds on small or demo pieces of plastic before starting your actual project. This will help you appropriately prepare for the project at hand and ensure that you’ll get the weld right on your first try.
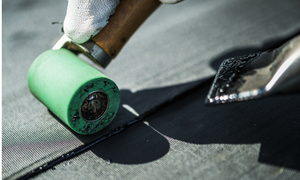
10. Where Applicable, Use a Seam Roller
When overlap welding flexible membranes (awnings, pond and pool liners, roofing, signage, tarpaulins, etc.), it is important to use a seam roller to properly form and meld together a uniform weld once both the top and bottom membranes have been sufficiently heated.
Now That You Have The Tips, Find The Right Tool
You’re equipped with the tips to perform a strong weld, but do you have the right tool to make it happen? Reach out and we can help you identify the right tool for your application.

- Robert Heater